Exterior painting is often described as a color decision, but the preparation determines whether a finish looks clean and holds up. A house can have a good paint product and still disappoint if dirt, loose coating, open caulk, damaged trim or trapped moisture were left underneath. In Florida, that matters even more because sun, rain and humidity give every weak spot a chance to show itself.
Homeowners do not need to become paint contractors to make a smarter plan. The goal is to recognize the condition of the exterior, remove the easy obstacles, ask the right questions and let the surface dictate the scope. Use this checklist before requesting a quote or scheduling a repaint, then let a close look at the property settle the details.
1. Start With a Slow Walk Around the House
Begin on a dry day when you can see the walls clearly. Walk each side of the home and pay closer attention to the spots that take the most weather: trim around windows and doors, fascia, corners, railings, porch details, the bottom edge of siding and any wall that faces the stronger afternoon sun. Take wide photos of each elevation and close photos of areas that need a second look.
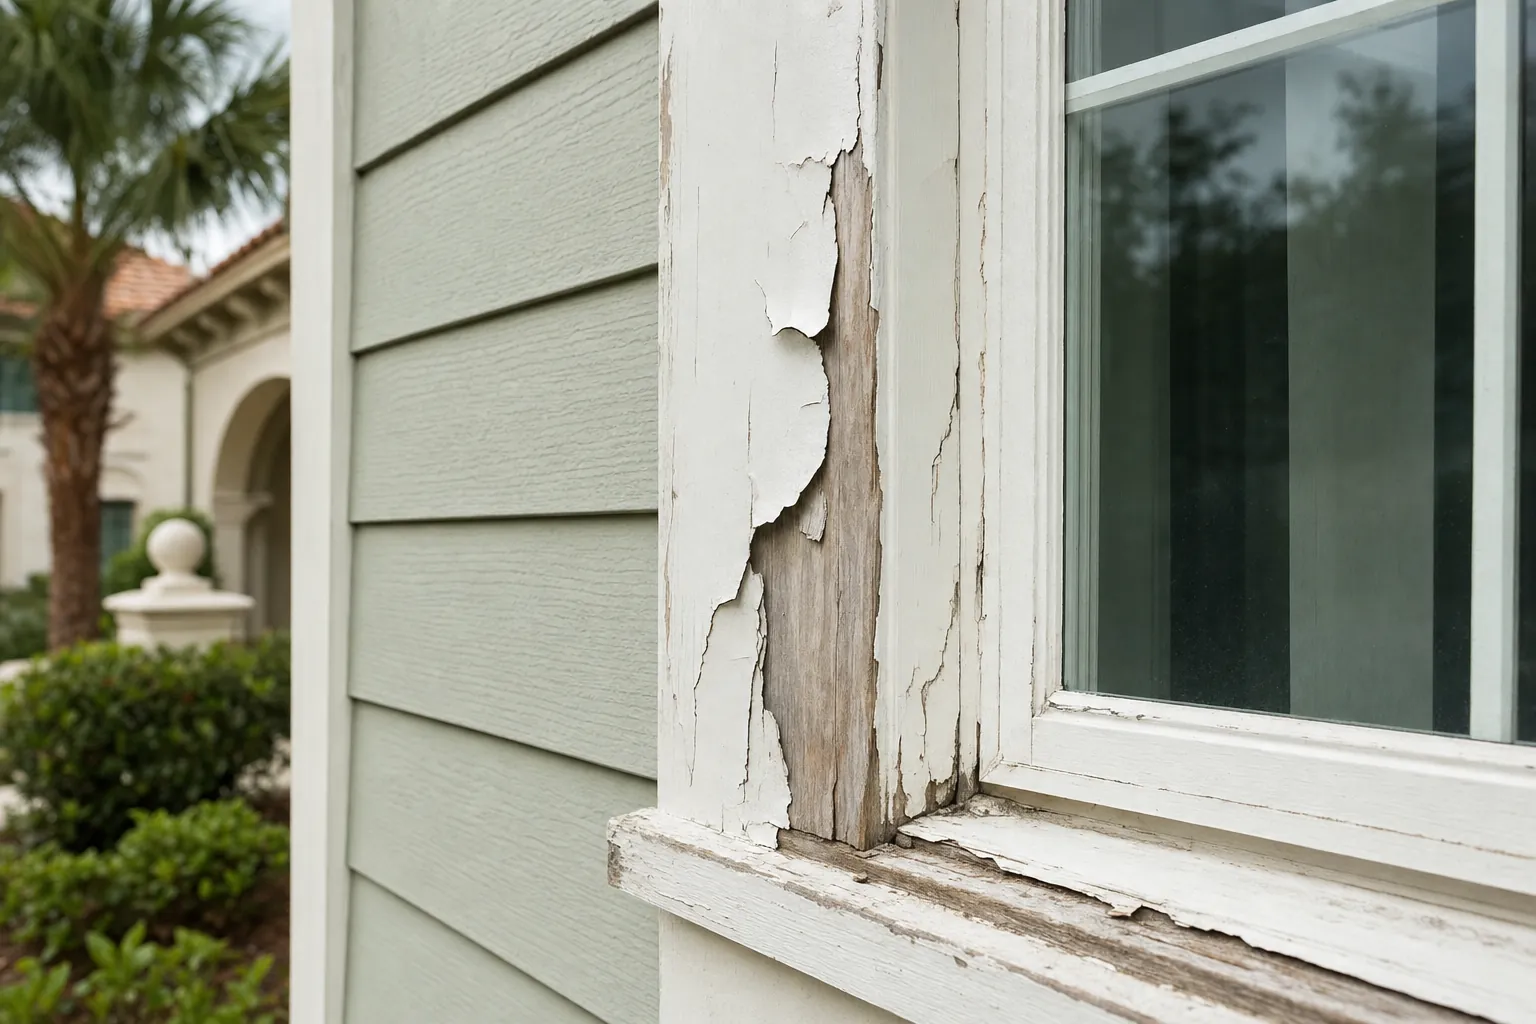
Look for more than dramatic peeling. Powdery paint, uneven sheen, hairline cracks, open joints, rust marks, mildew that returns after cleaning and trim that feels soft are all useful clues. A small problem may only need localized preparation. A repeated pattern across several sides can mean the repaint needs a broader scope.
If you are still deciding whether the exterior needs a full repaint or maintenance work, start with the guide on when to repaint a Florida house. It helps separate normal aging from signs that the protective coating is losing ground.
2. Clean the Surface, Then Let It Dry
Paint needs a clean, dry, sound surface. Dirt, chalking residue, mildew, pollen, salt residue and loose paint can interfere with adhesion, so cleaning is not a cosmetic extra. Sherwin-Williams advises removing surface contamination, rinsing thoroughly and allowing the exterior to dry before repainting. Its surface-preparation guidance also calls for scraped or checked paint to be taken back to a sound surface.
The cleaning method should match the surface. Stucco, painted wood, masonry, siding and delicate trim do not all respond the same way to water pressure and cleaners. A controlled wash may be appropriate, while aggressive pressure can damage some finishes or push water into places it should not go. The useful question is not simply whether a house was washed. It is whether the cleaning removed the contamination without creating another problem.
After washing or rain, do not rush the next step. The surface must be dry enough for the coating system being used. Sherwin-Williams notes that exterior work should not begin immediately after rain, during foggy conditions or when rain is expected unless the product specifically allows for those conditions. In St. Augustine, that makes the forecast part of the work plan, not an afterthought.
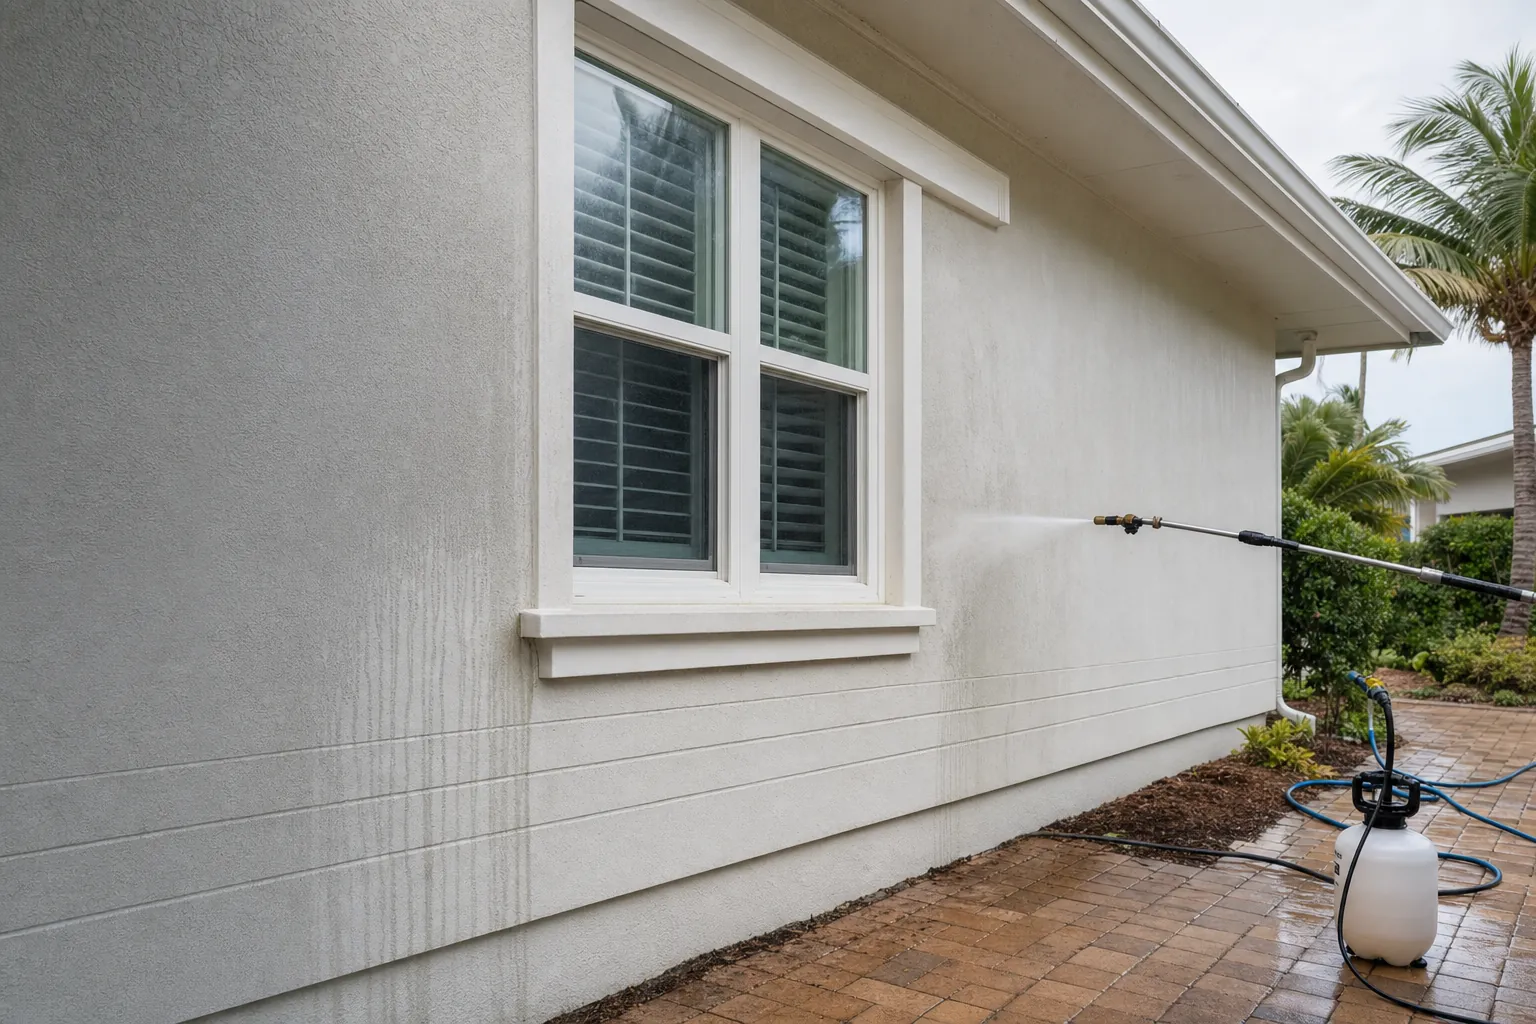
3. Remove Loose Paint, But Do Not Hide the Cause
Flaking paint, loose caulk and surface rust need attention before a fresh coat goes on. Scraping and sanding are not about making every inch look perfect. They are about getting back to a stable edge so the new system has something reliable to hold. Glossy paint may also need to be dulled so the next coating can bond as intended.
Pay attention to why a spot failed. Paint peeling beside a gutter, window or roofline may point to repeated water exposure. Bubbling can suggest a moisture or adhesion issue. Soft trim can mean the board itself needs repair or replacement. Covering those signs can make a home look better briefly, but it does not make the surface sound.
This is where Good Fellas' combination of painting and practical finish work is especially useful. The exterior paint scope can be coordinated with trim and finish carpentry when the details around a window, door or roofline need attention first. The goal is one complete finish, not a new paint layer over an unfinished repair.
4. Repair Open Joints and Damaged Trim
Caulk has a simple but important job: it helps close gaps where different exterior materials meet. Check around window and door trim, corner boards, fascia, penetrations and other changes in material. If caulk has split, pulled away or gone missing, the joint needs attention before paint. A fresh coat may bridge a tiny hairline crack for a while, but it is not a replacement for a properly prepared joint.
Wood trim deserves the same honesty. A small nick, nail hole or shallow defect can often be filled and sanded. Soft wood, a loose board or a recurring stain is different. Those issues should be understood and repaired before primer and paint. The same principle applies to masonry cracks, rusting metal and damaged siding: fix the material first, then finish it.
A repair-first plan also gives homeowners a better quote. Instead of a vague promise to touch up as needed, the scope can identify which repairs are included, which areas may need a closer look and how changes will be handled if hidden damage appears once preparation starts.
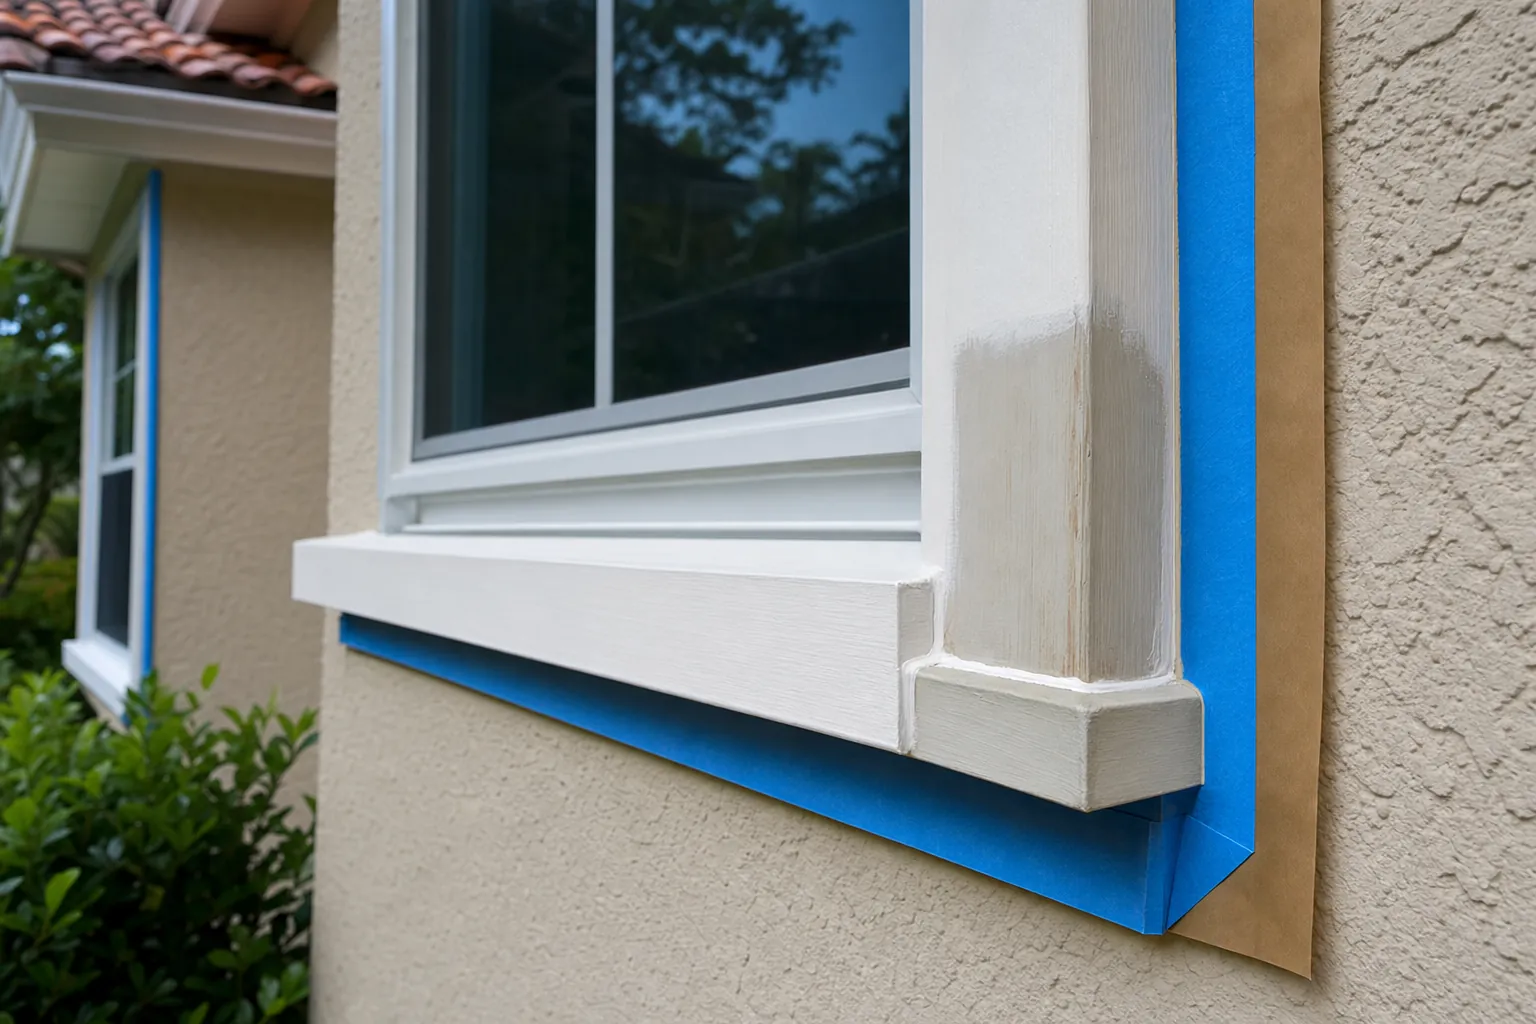
5. Prime Where the Surface Calls for It
Primer is not automatically a full-house step, but it is important where the surface needs it. Bare wood, repaired areas, exposed substrate, stains and certain changes in coating commonly need primer so the finish coat can look even and adhere properly. The correct primer depends on the surface and paint system, so a blanket answer is less useful than a surface-by-surface plan.
Ask what will be spot-primed, what will receive a full prime coat and why. That one conversation can reveal whether the preparation is connected to the actual condition of the house. If the existing coating is sound and compatible, a full prime coat may not be necessary. If bare areas or repairs are widespread, it may be part of the right system.
Do not let primer become a substitute for repairs. It can help create a uniform, stable base, but it cannot make soft trim sound, close an active water path or correct a surface that was not cleaned and dried properly.
6. Check the Weather Window and Product Instructions
A clear morning does not automatically make it a paint day. Exterior coatings have product-specific limits for temperature, surface temperature, humidity and drying time. Rain can arrive quickly in Florida, and a wall can stay damp longer than it looks, especially in shade or near dense landscaping. A thoughtful schedule takes those conditions seriously before the first coat is applied.
Ask how the work will be sequenced around the forecast. The answer should account for cleaning, drying, priming and finish coats, not only the day a crew expects to arrive. It should also account for which sides of the house receive direct sun and when. A shaded wall, a hot west-facing wall and a protected porch may need different timing on the same property.
The Sherwin-Williams exterior-painting guide recommends allowing at least 24 to 48 hours for a washed exterior to dry before painting, while the product label and actual conditions still control the final decision.
7. Protect the Property Before Work Begins
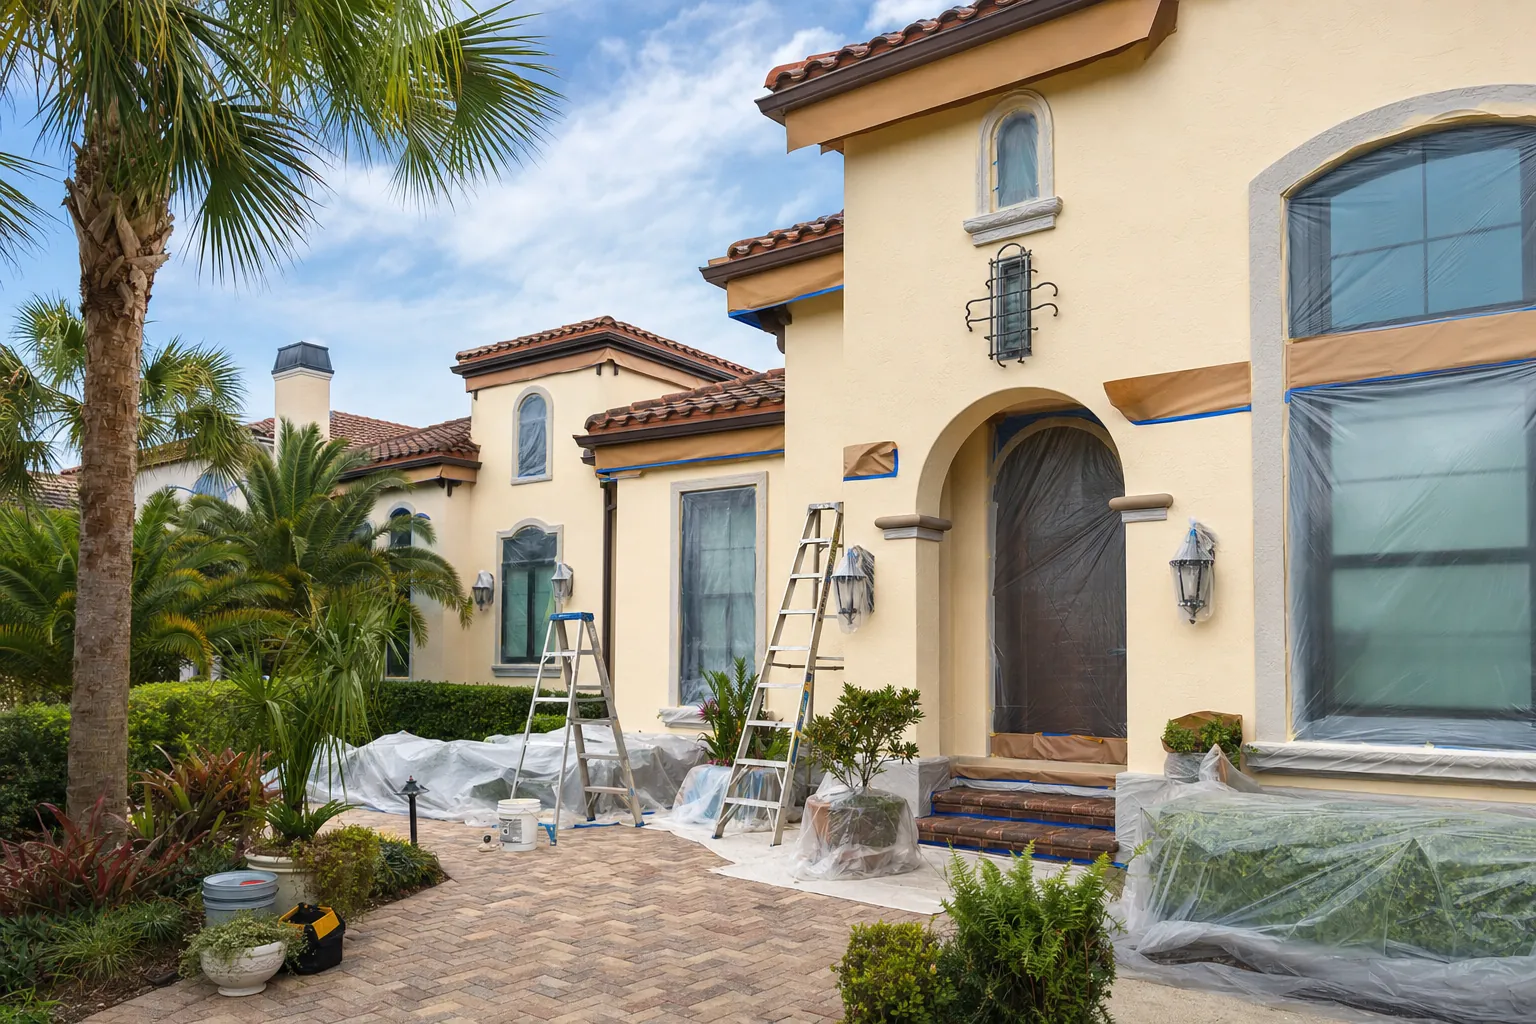
Good preparation includes the home around the paintable surfaces. Windows, doors, fixtures, landscaping, pavers, pool areas, outdoor furniture and nearby vehicles should all be considered before work starts. The protection method will vary, but the result should be simple: the work area is organized, the important features are covered or moved as needed and the crew has a clear path to each side of the house.
Homeowners can help by moving vehicles, grills, patio furniture, potted plants and fragile decorations away from the walls when practical. Let the crew know about exterior cameras, irrigation, landscape lighting, gates, pets, special plants or areas where access is limited. Those details are useful early because they affect the setup, not just the cleanup.
The project gallery shows the type of painting, repair and finish work Good Fellas handles locally. It is a useful place to look when you want the scope to account for the parts of a home that surround the paint, not only the main wall fields.
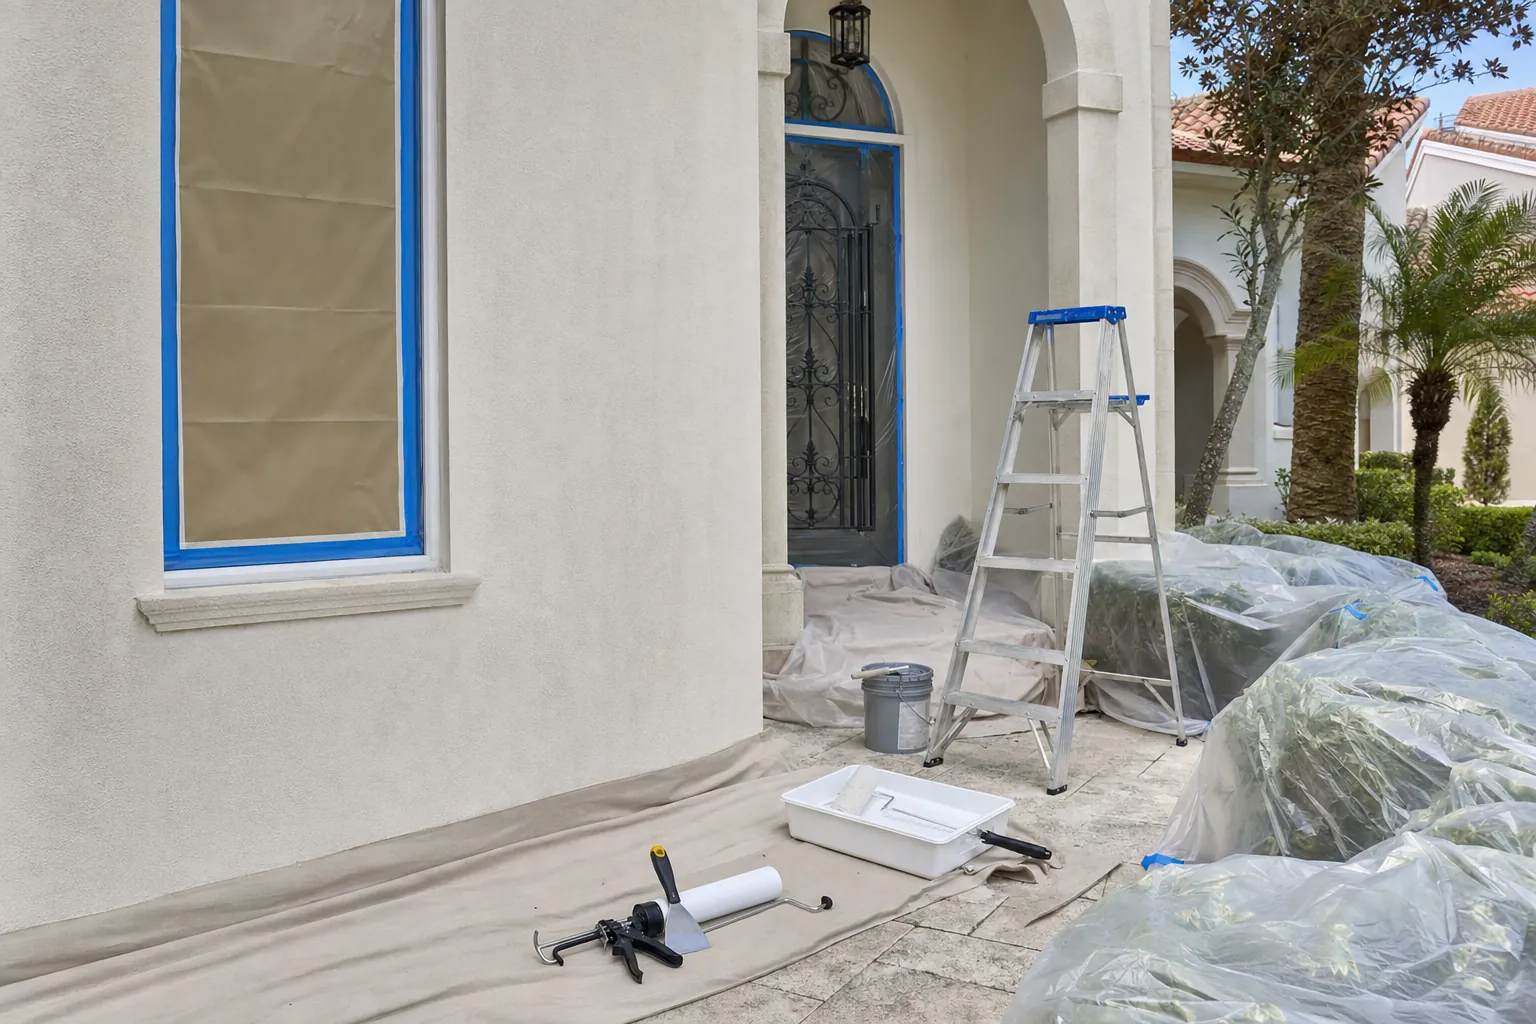
8. Handle Older Paint Safely Before Scraping or Sanding
If the house was built before 1978, pause before disturbing old paint. The EPA explains that lead-based paint may be present in older homes, and work that creates dust needs the right safety approach. Its Renovation, Repair and Painting program covers requirements that apply to contractors, property managers and others who disturb painted surfaces in pre-1978 housing and child-occupied facilities.
For a homeowner, the practical takeaway is simple: do not treat old peeling paint as an ordinary sanding job without first understanding the age of the home and the safety steps involved. The EPA's lead-safe renovation guidance for DIY work recommends containing the area, controlling dust and cleaning carefully when lead may be present.
9. Bring a Clear Checklist to the Painting Conversation
Before requesting a quote, gather the photos from your walk-around and note the items that concern you: peeling areas, failed caulk, damaged trim, moisture stains, color changes and surfaces that are hard to reach. Mention your preferred timing, whether you are keeping the current color and any exterior features you want included, such as doors, shutters, railings, soffits, fences or detached structures.
Then use the estimate to compare scopes, not just totals. A complete exterior plan should make it easier to see what will be cleaned, scraped, repaired, caulked, primed, painted and protected. The guide to Florida exterior-painting costs explains why those preparation details often matter more than a simple price-per-square-foot estimate.
When you are ready, request a quote from Good Fellas. The owner-led approach is built for the real-world overlap between exterior painting, repairs and finish details, so the conversation starts with the condition of the house and ends with a finish that makes sense for it.
A Quick Pre-Paint Checklist
Before the painting conversation, make a short list of the exterior's condition: which sides have fading or peeling, where caulk has opened, whether any trim is soft or stained, what needs to be moved, and whether a prior leak or drainage issue may still be active. Add a few photos in good daylight. Those details help turn a general request into a clear plan.
Then keep the order straight. Clean and dry the surface. Repair what is damaged. Prepare stable edges. Prime where the system needs it. Protect the property. Finally, apply the finish when the weather and product requirements allow. That sequence is less glamorous than choosing a color, but it is what gives the color a fair chance to last.
Frequently Asked Questions
How long should a house dry before exterior painting?
The right drying time depends on the surface, cleaning method, weather and paint product. After washing or rain, the exterior needs to be truly dry before paint is applied. A painter should follow the coating manufacturer's requirements rather than relying on the clock alone.
Do I need to pressure wash before exterior painting?
The exterior needs to be clean, but the right cleaning method depends on the material and its condition. A controlled wash can remove dirt, mildew and loose material, while overly aggressive pressure can damage some surfaces or force water where it does not belong.
What repairs should happen before exterior painting?
Address peeling paint, failed caulk, soft or damaged trim, open joints, stains and any moisture issue before coating. Paint can improve the appearance of a sound surface, but it does not correct the reason a surface is failing.
Should I prime every exterior surface before painting?
Not always. Bare wood, repaired areas, stains, exposed substrate and certain surface changes commonly need primer, while a sound, compatible existing coating may not need a full prime coat. The surface and paint system should decide.
What should I move before painters arrive?
Move vehicles, outdoor furniture, grills, potted plants and fragile decorations away from the work area when practical. Let the painter know about gates, irrigation, cameras, landscape lighting and anything that needs special access or protection.